Debugging iOS Safari (when all you have is a Mac)
If you’re like me, you’ve experienced this more than once: you have a pristine new web project you’re excited about. You’ve poured your heart and soul into it, and you’re close to launching it for the world to see.
Suddenly, it occurs to you: you haven’t tested it on iOS yet. And so you grab an iPhone and pull up the staging URL.
The page loads, and you squint. Bewilderment sets in. Maybe you even feel some denial and hit the refresh button once or twice. Is it the cache? Did you type the URL wrong? No…
You lean forward, staring through narrowed eyes at some bizarre mutation of your carefully crafted code. How could this happen!?
It’s just a fundamental truth of web development—one which presents a challenge for those of us who don’t have easy access to all relevant devices. In my case, an iPhone is the missing piece. I, personally, have never owned one, and nobody in my household currently uses one. So when it comes to testing and debugging iOS Safari, my options are limited.
Compounding the problem: iOS Safari is very much its own beast. It can at times behave very differently from MacOS (desktop) Safari.
I went down a rabbit hole of ways to address this issue, and found some solutions that don’t seem to be very popular for some reason—or at least, not widely discussed. (I speculate that many developers in the U.S. either have access to an iPhone, or to a paid BrowserStack subscription.)
For the rest of us—working on a Mac, but without access to an iPhone or a paid subscription service—here are a couple of viable choices.
And as a preview: there’s a section at the end where I offer some thoughts on the current, inequitable state of affairs when it comes to debugging Safari. But first, let’s get to the options.
The simple option: MacOS Safari user agent emulation
Safari on MacOS offers a very helpful combination of features for testing and debugging: user agent emulation, and responsive design mode. Between the two of these features, MacOS Safari manages to replicate an iPhone environment with very high accuracy. It’s not perfect—and it’s missing some things—but it’s quick and easy if you already have a Mac on hand.
First steps
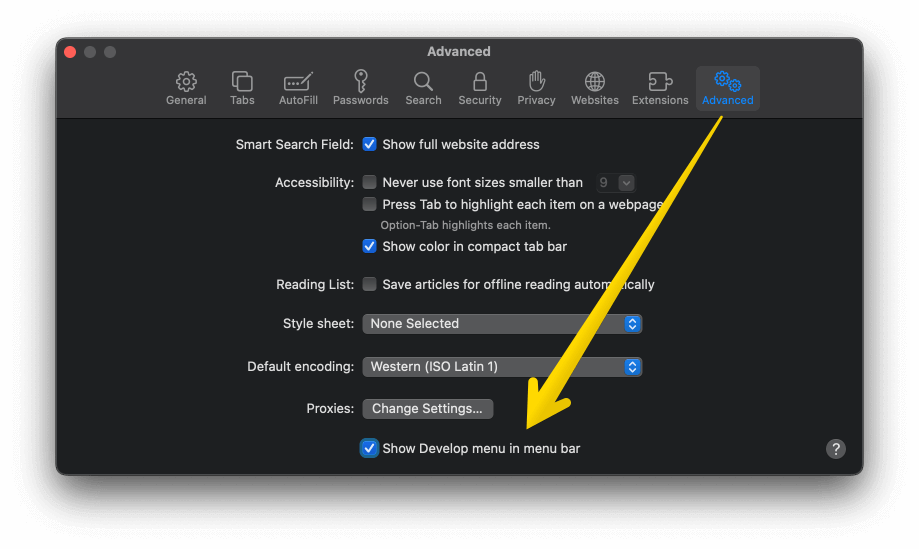
If you haven’t already, open Safari on MacOS and head to Safari › Preferences. Under the “Advanced” tab, make sure the “Show Developer menu in menu bar” option is checked. (This is required to access Safari’s dev tools, and because Apple hates web developers is geared towards casual users, this access is off by default.)
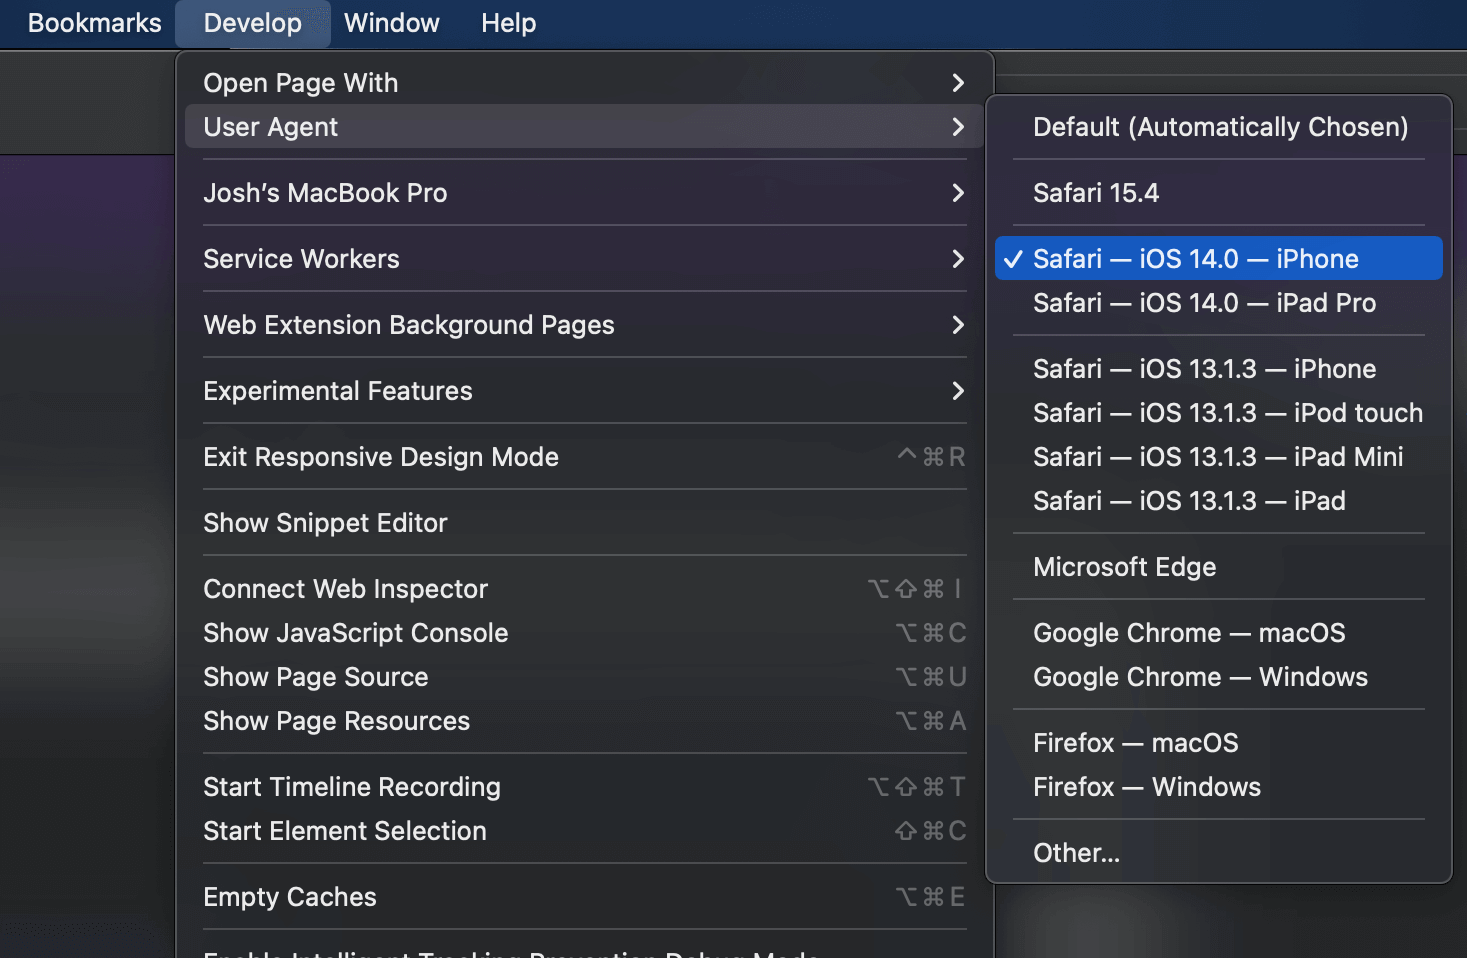
Next, still in Safari, open Develop › User Agent, and choose the device you want to emulate. (When in doubt, the latest iPhone available is probably a good place to start.)
Finally, open the Develop menu again, and select “Enter Responsive Design Mode” (a few options below “User Agent”).
Once you do, you’ll see menu appear with a selection of iOS devices. Click one, and the browser viewport will automatically resize to match the selected device.
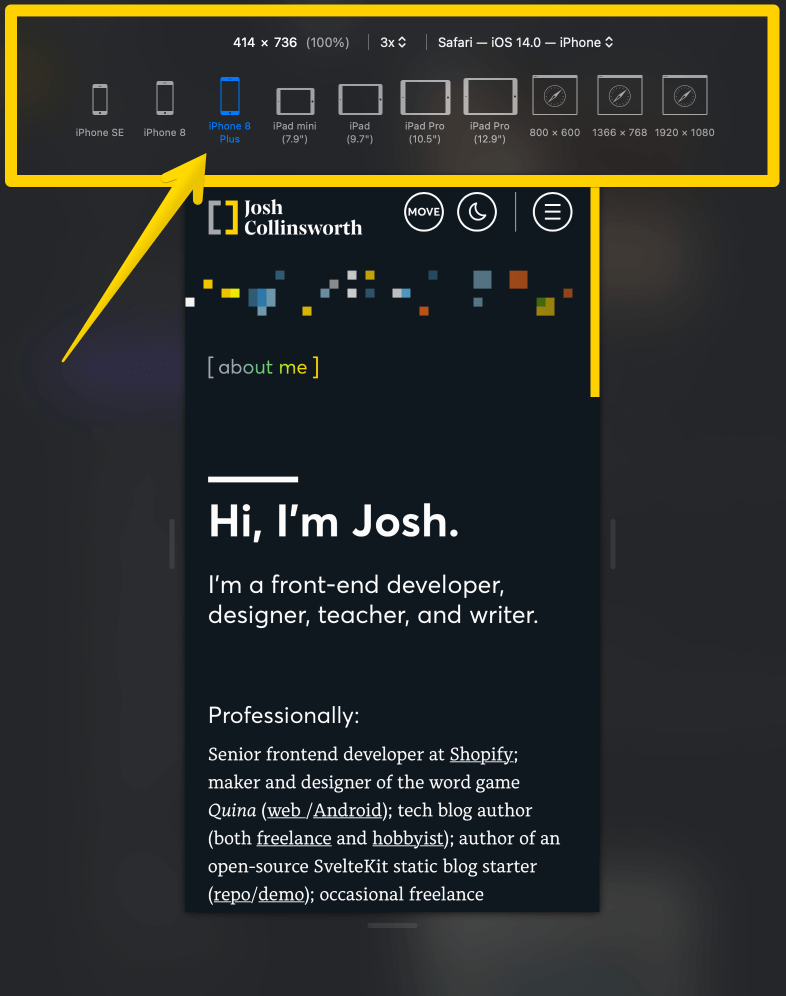
You can also rotate the screen to switch between portrait and landscape mode, or even imitate the size of an app in a split-screen scenario (e.g., one third of an iPad screen).
Credit where it’s due: this is an extremely nice feature to have built into desktop Safari. However, this approach also has its limits. There’s no browser chrome (i.e., browser bar and navigation) or other iPhone UI shown, and you don’t see the shape or edges of the device—things that might have a significant impact on the user experience. Plus, as mentioned, behavior between MacOS Safari and iOS Safari is not always perfectly 1:1.
So, if you want to cover all your bases, we need to go to our next option…
The comprehensive option: Xcode device simulator
Don’t panic. This option might seem extremely complex, but it’s not difficult, and it gives you a free, unlimited way to essentially use an iPhone on your Mac.
The downside, however: this approach requires you to commit a lot of time and disk space up front. You’ll need several gigabytes of free disk space, both for Xcode and its simulator(s), and the time do download all of it, so be sure you have those resources before you start. (It will take at least 15–20 gigs to install both Xcode and one simulator. You can get by with just one simulator, but you may want more.)
Xcode is an app primarily for developing Mac and iOS apps. We aren’t going to use it for that, though; we’re just going to use its very handy device simulator.
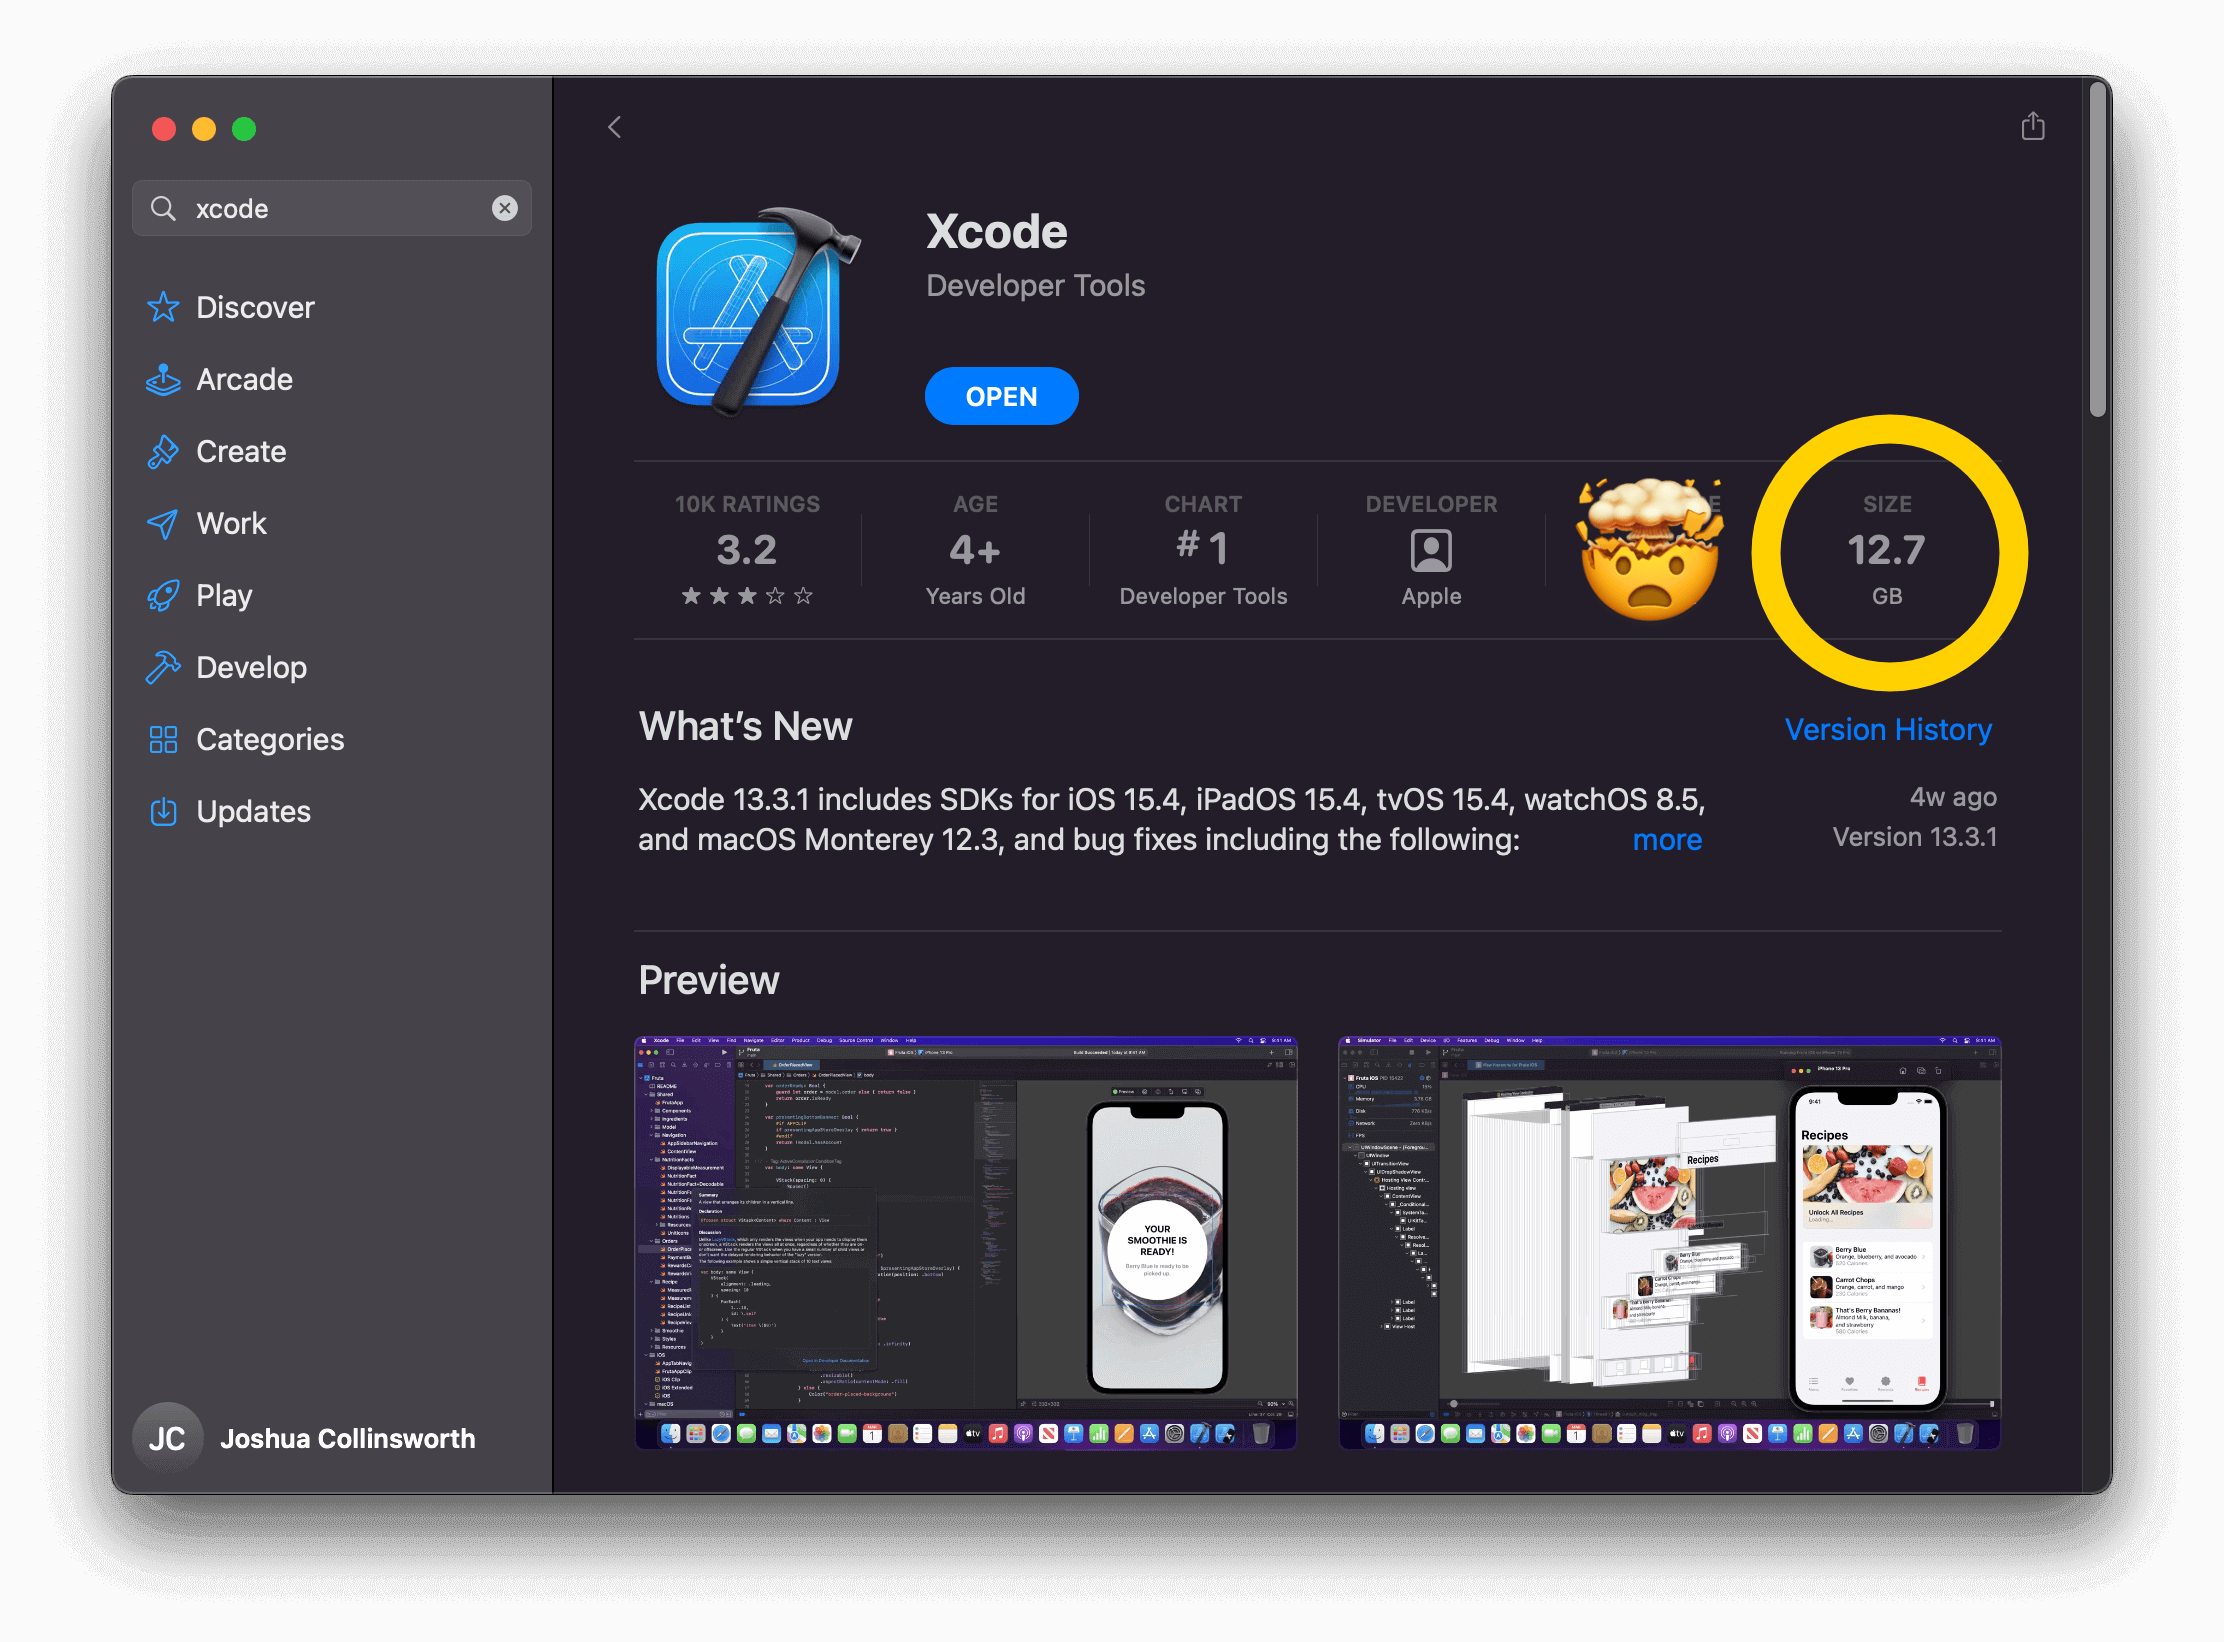
The first step is to head to the App Store and download Xcode (if you don’t have it already; there’s a chance you might, if you use your Mac for development).
As a warning: Xcode is an extremely large download, so this step may very well take an hour or more, depending on your connection.
Once Xcode is downloaded and installed, open it. Ignore whatever prompts and alerts it greets you with, and open Xcode › Preferences.
In Xcode preferences, select the “Components” tab, and you’ll find a list of available simulators. Choose the one you want (I’d start with the latest iOS, but you may want others, too, depending on what’s popular with your users), and click the download icon. Sadly, each simulator is several gigabytes, so you’re in for another long wait at this point.

Once your emulator of choice is downloaded and installed, however, you’re ready!
With Xcode open, head to Xcode › Open Developer Tool › Simulator. You should see an iPhone show up on screen, running the iOS version you chose. The full iPhone UI is available here; your simulated device starts up and shuts down. It has memory and apps. It has the infamous notch. And most importantly for our testing purposes: when you open Safari, it features the full browser, complete with UI, that show us how our web site or app really looks in the hands of a user.
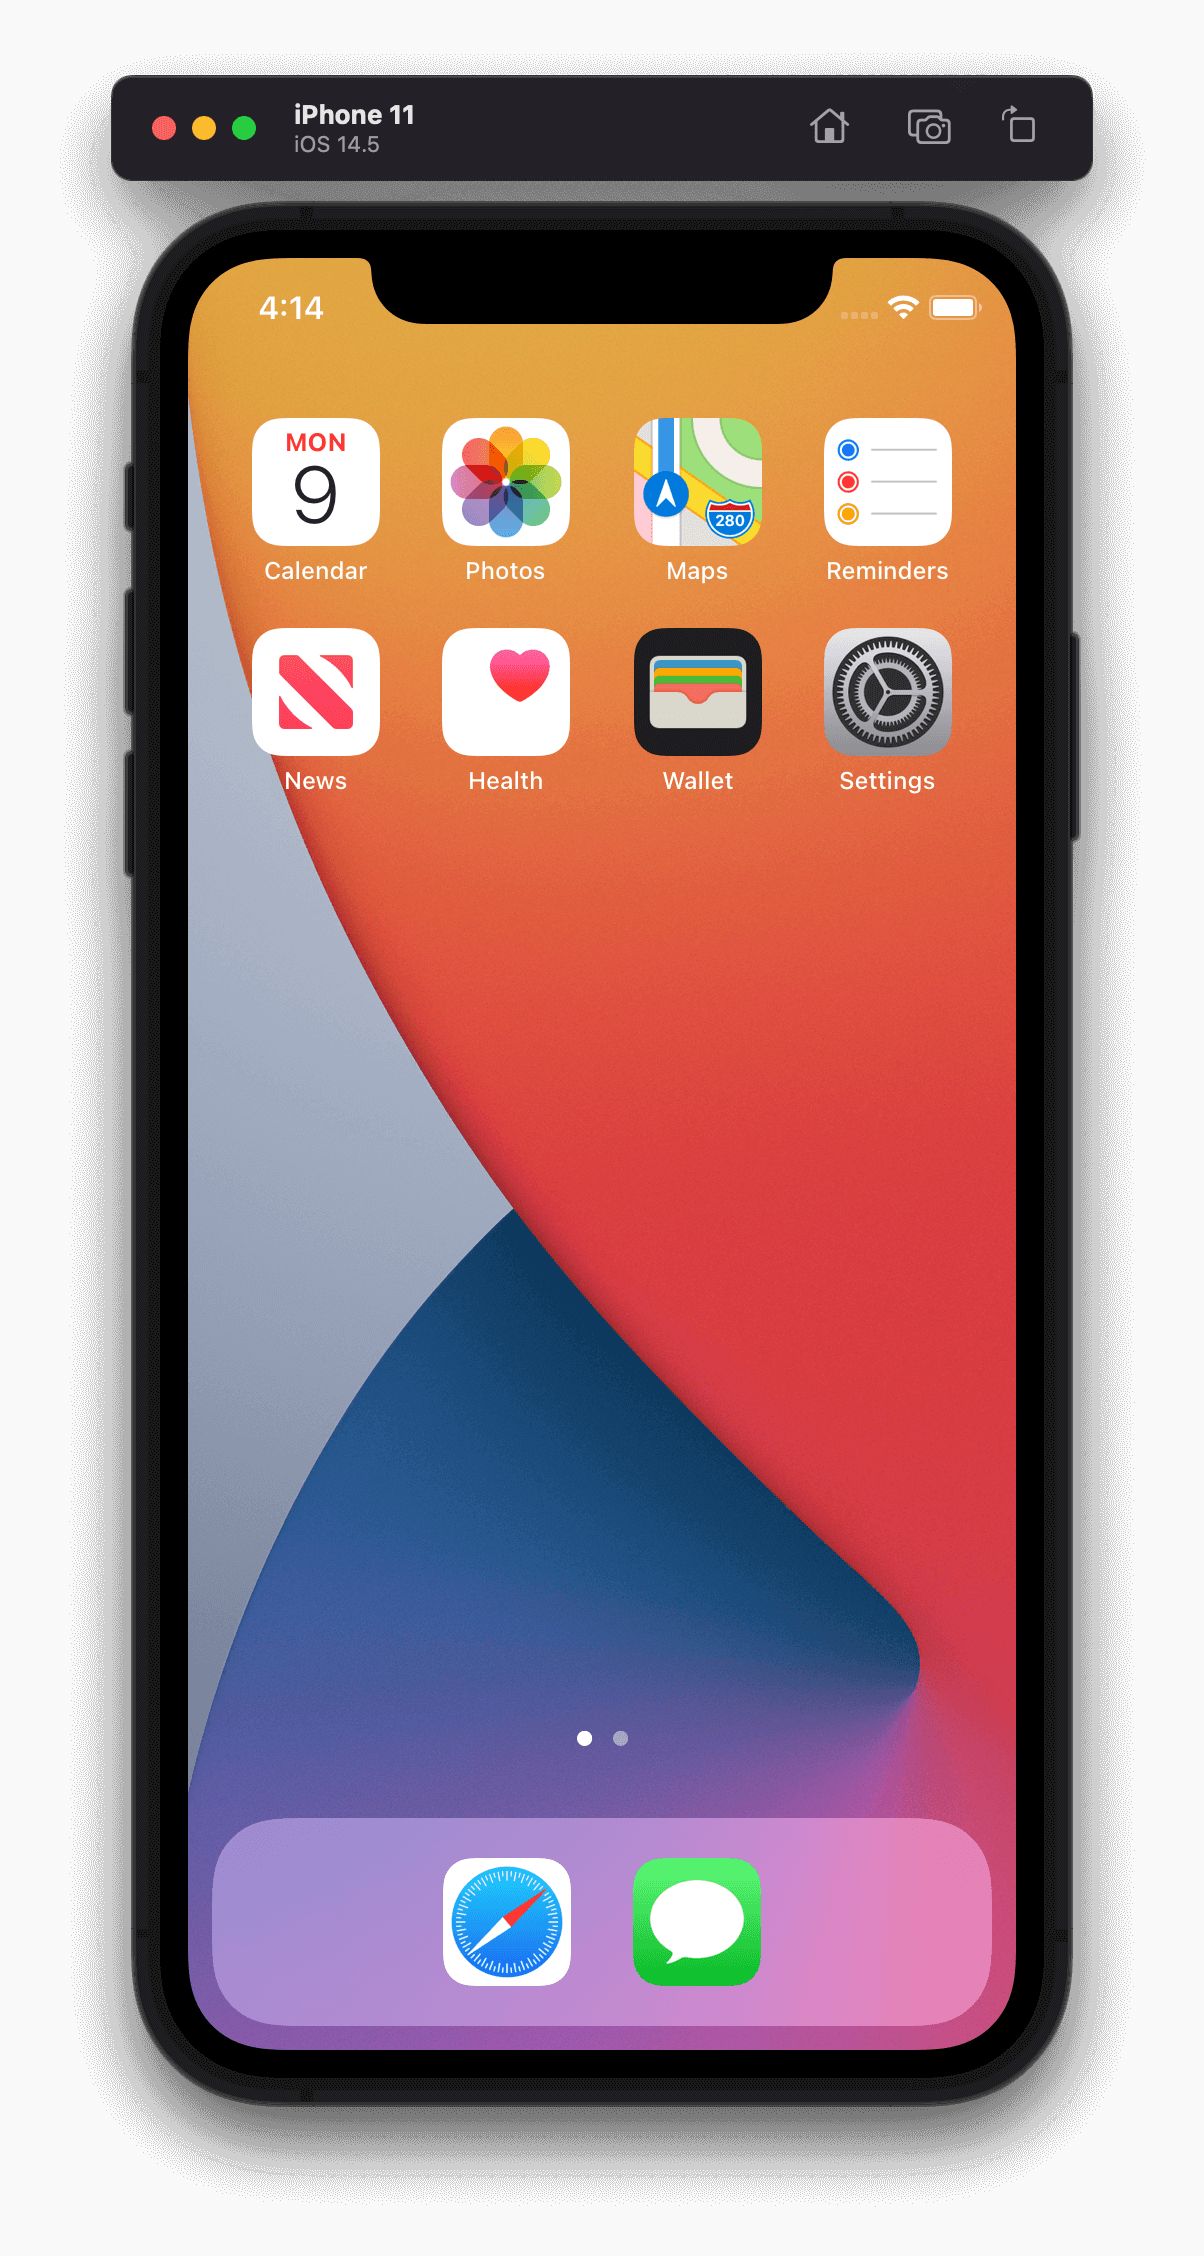
It’s about the closest you can get to testing on an actual iPhone (or other iOS device) without having one in your hands.
Worth noting: I did experience at least one visual bug on the simulated iPhone that MacOS Safari’s emulation failed to reproduce. So while this approach requires a lot of setup, it’s well worth it if you don’t have any better options for testing iOS Safari.
Epilogue: Safari is pay-to-play
This entire post is geared towards developers who—like me—have access to a Mac. There is no Safari or Xcode on Windows, or any other non-Apple operating system.
That, sadly, means Safari is effectively a pay-gated development environment. You need to own a Mac or an iOS device if you want to develop and test in Safari.
Yes, there are services such as the previously-mentioned BrowserStack available, but crucially, those are all paid services. Many have free trials and such available, but that only goes so far.
This is a sad state of affairs, because it locks out people who can’t afford premium pricing merely to see what some of their users will see. Any economically disadvantaged user is at a further disadvantage right off the bat—one that is importantly not leveraged by any other browser or operating system.
Any user can get Chrome, Edge, Firefox, and a slew of other browsers on virtually any device, for free. These browsers are not restricted to running on any particular operating system (and to the extent they are restricted, it is by Apple, and specifically on iOS).
These browsers offer level playing fields—at least, as much as possible for an activity that requires a computer and an internet connection. I can test on Firefox on my high-end MacBook Pro just as easily as a kid on her school Chromebook or a working mom on her low-powered Windows laptop. We’re all able to see what our users see when those users open Firefox, Chrome, or Edge. Sure, my machine is beefier, but none of us has browser-level advantage.
But when it comes to Safari, that kid and that mom are out of luck. I get something they don’t, just because I can afford to buy it.
Yes, you could make the same argument about Android (and we should!), but as far as I’m aware, the differences between the desktop and Android versions of Chrome are far more minimal than those between MacOS Safari and iOS Safari. Plus, again, you can get Chrome (Android’s default browser) on any device, and be pretty certain it will reproduce fairly faithfully across devices and operating systems.
By contrast, you can’t use Safari anywhere but on an Apple operating system. Plus: it seems Android emulators are much more plentifully available than options to emulate iOS—probably because Android is open-source, and iOS is closed-source.
As long as Safari continues to be locked down inside a paywall—as long as you need to either give your money to Apple or a testing service before you can use Safari—it will continue to be a force for inequity on the supposedly open web.
I hope Apple will take this into consideration, as it touts “inclusivity” and such, and will take action to ensure that developing the web for iOS and/or Safari doesn’t remain pay-to-play.